 Get in touch
 English
 Deutsch
 中文简体
中文简体 Español

1. Introduction: Deconstructing AC Induction Motor Horsepower The AC Induction Motor is one of the m...
READ MOREIndustry News
2026-05-25
Content
The fan motor is the heart of any evaporative cooler. It drives the blower wheel that pulls air through the water-saturated pads and pushes cooled air into the living space. When the motor begins to fail — running hot, struggling to start, or shutting off mid-cycle — the entire cooling system is compromised. Left unaddressed, a deteriorating motor draws excess current, accelerates winding insulation breakdown, and can become a fire or electrical hazard.
Most cooler fan motor failures are preventable or repairable if caught early. Understanding the root causes of overheating and the correct repair sequence can extend motor life by years and save the cost of a full unit replacement.
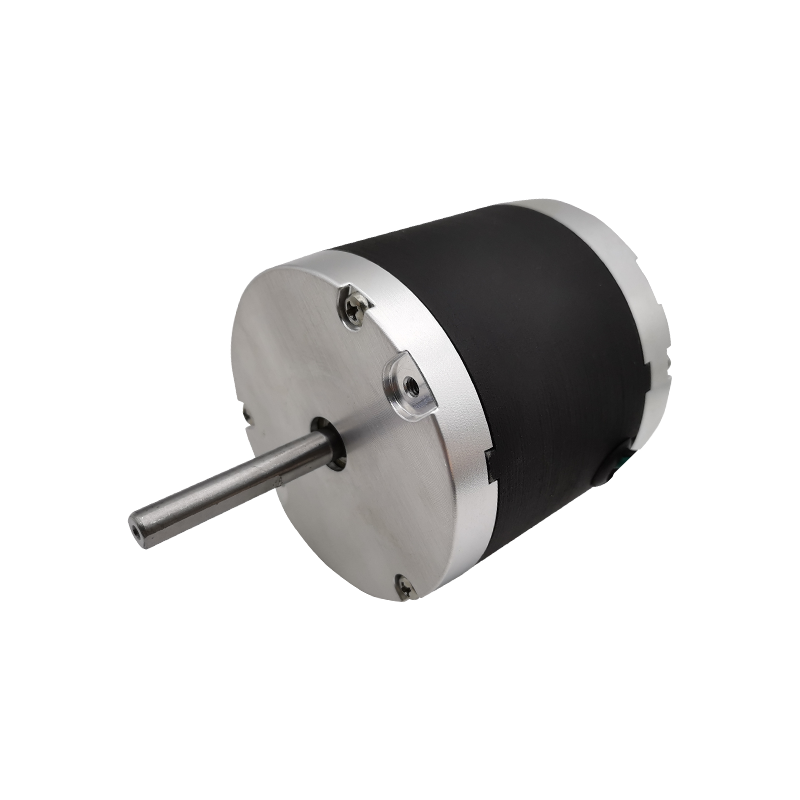
Evaporative cooler motors operate in a demanding environment — continuous duty cycles, mineral-laden moisture, and high ambient temperatures during peak summer use. Overheating is the most frequently reported motor symptom, and it has several distinct causes that each require a different corrective approach.
Most swamp cooler motors use sleeve bearings or ball bearings at both the drive end and the opposite drive end of the shaft. These bearings require periodic lubrication — typically a few drops of SAE 20 non-detergent oil applied to the oil ports at the start and midpoint of each cooling season. When bearings run dry, friction increases sharply, generating heat that transfers directly into the motor windings. Dry bearings are the single most common cause of swamp cooler motor overheating and are entirely preventable through seasonal maintenance. A bearing running without lubrication emits a distinct high-pitched squeal before the motor begins to run abnormally hot.
Single-phase induction motors — the type used in virtually all residential evaporative coolers — rely on a run capacitor to maintain the phase shift between the main and auxiliary windings during operation. When the capacitor degrades, the motor loses torque efficiency: it draws more current to produce the same mechanical output, and the excess electrical energy converts directly to heat within the windings. A failing capacitor often causes the motor to hum loudly on startup, fail to reach full speed, or trip the thermal overload protector repeatedly. Capacitors are inexpensive components, typically costing between $5 and $25, and replacing a failed capacitor is one of the most cost-effective cooler fan motor repairs possible.
Evaporative cooler motors are designed with ventilation slots that allow ambient air to circulate through the motor housing and carry heat away. When mineral scale, dust, cottonwood seeds, or insect debris accumulates on these vents or on the blower wheel, airflow is restricted in two compounding ways: the motor receives less cooling airflow, and the blower works harder against increased resistance, drawing more current. Inspect and clean the motor housing vents and blower wheel at the start of every cooling season.
Motors rated for 120V that receive consistently low voltage — common in homes with long circuit runs, undersized wiring, or during peak-load brownout conditions — must draw proportionally higher current to maintain torque. This excess current produces heat in the windings. Use a multimeter to verify the supply voltage at the motor terminals under load. A reading below 108V on a 120V-rated motor warrants an electrician's assessment of the branch circuit.
In motors that have run hot repeatedly over multiple seasons, the varnish insulation on the copper windings degrades progressively. Degraded insulation allows inter-winding short circuits that reduce winding resistance, increasing current draw and accelerating the thermal cycle further. Once winding insulation has failed extensively, motor rewinding or replacement is the only reliable solution — no external repair addresses this root cause.
Before disassembling or replacing any component, a systematic diagnostic sequence prevents misdiagnosis and unnecessary parts expenditure. Perform these checks in order:
| Symptom | Most Likely Cause | Recommended Action |
|---|---|---|
| Motor hums but won't start | Failed start/run capacitor | Test and replace capacitor |
| Motor starts, shuts off after 10–20 min | Thermal overload tripping due to overheating | Lubricate bearings, clean vents, check voltage |
| Motor runs but blows warm air | Low speed / reduced torque from capacitor or winding fault | Test capacitor, measure current draw |
| Squealing or grinding noise | Dry or worn bearings | Lubricate or replace bearings / motor |
| Burning smell from motor | Winding insulation failure | Replace motor |
| Trips circuit breaker on startup | Seized bearings or shorted windings | Check shaft rotation, test winding resistance |
The following procedures cover the most common and accessible cooler fan motor repairs. Always disconnect and lock out power at the breaker before working on any motor. Capacitors store lethal charge — discharge them before handling.
Locate the oil ports on each end cap of the motor — they are typically plugged with a felt wick or a rubber plug. Remove the plug, apply 5–7 drops of SAE 20 non-detergent electric motor oil (do not use WD-40 or general-purpose oil sprays), replace the plug, and rotate the shaft by hand several times to distribute the lubricant. If the shaft remains stiff or grinding persists after lubrication, the bearing has worn beyond recovery and the motor should be replaced.
Photograph the existing capacitor wiring before disconnecting. Discharge the capacitor by bridging the terminals with a 20,000-ohm, 5-watt resistor for 5 seconds. Replace with a capacitor of identical voltage rating and microfarad value — or within the motor manufacturer's specified tolerance range, typically ±5–10%. Reconnect terminals exactly as photographed. Never substitute a capacitor with a higher µF value without verifying motor compatibility, as this alters the phase shift and can cause overheating of the auxiliary winding.
With power disconnected, use compressed air to blow out the motor ventilation slots from the inside outward. Remove the blower wheel — most are secured with a single set screw — and scrub mineral deposits from the blades with a stiff brush and white vinegar solution. Reinstall with the set screw torqued firmly; a loose blower wheel causes vibration that accelerates bearing wear.
When diagnosis confirms winding failure, seized bearings, or repeated thermal cutout tripping despite correct voltage and clean bearings, motor replacement is the correct course. When sourcing a replacement motor, match these specifications from the original motor's nameplate:
A consistent maintenance routine eliminates the majority of motor overheating incidents before they develop. The following schedule applies to residential evaporative coolers in regular seasonal use:
A motor that receives correct lubrication and operates within its rated current draw can last 10 to 15 years in residential evaporative cooling applications. One that runs dry, overloaded, or in a debris-choked housing may fail within a single season.
Not every motor fault justifies repair. Use this framework to make the right call:
Replacement motors for common residential cooler brands are widely stocked at HVAC supply houses and online retailers, and most installations require no special tools beyond basic hand tools and a multimeter. Matching the motor nameplate specifications precisely — particularly HP, RPM, and shaft dimensions — is more important than brand matching when selecting a replacement.
1. Introduction: Deconstructing AC Induction Motor Horsepower The AC Induction Motor is one of the m...
READ MORE1. Introduction In modern industrial automation, data center construction, consumer electronics upgr...
READ MOREStepper motors represent a cornerstone of modern motion control, offering precise positioning and re...
READ MOREThe industrial motor landscape is undergoing a significant transformation, driven by the relentless ...
READ MORERelated Products
Building 10, No.199, Jinfeng Road, Suzhou High-tech, Jiangsu Province, China
+86-133 3869 4967
+86-512 6876 9967
sean@retekmotion.com
rsgrivic@126.com
 WhatsApp
Copyright © Jiangsu Retek Motion Co., Ltd. All Rights Reserved. Custom OEM Industrial Multi Rotor Drone Motors Manufacturers